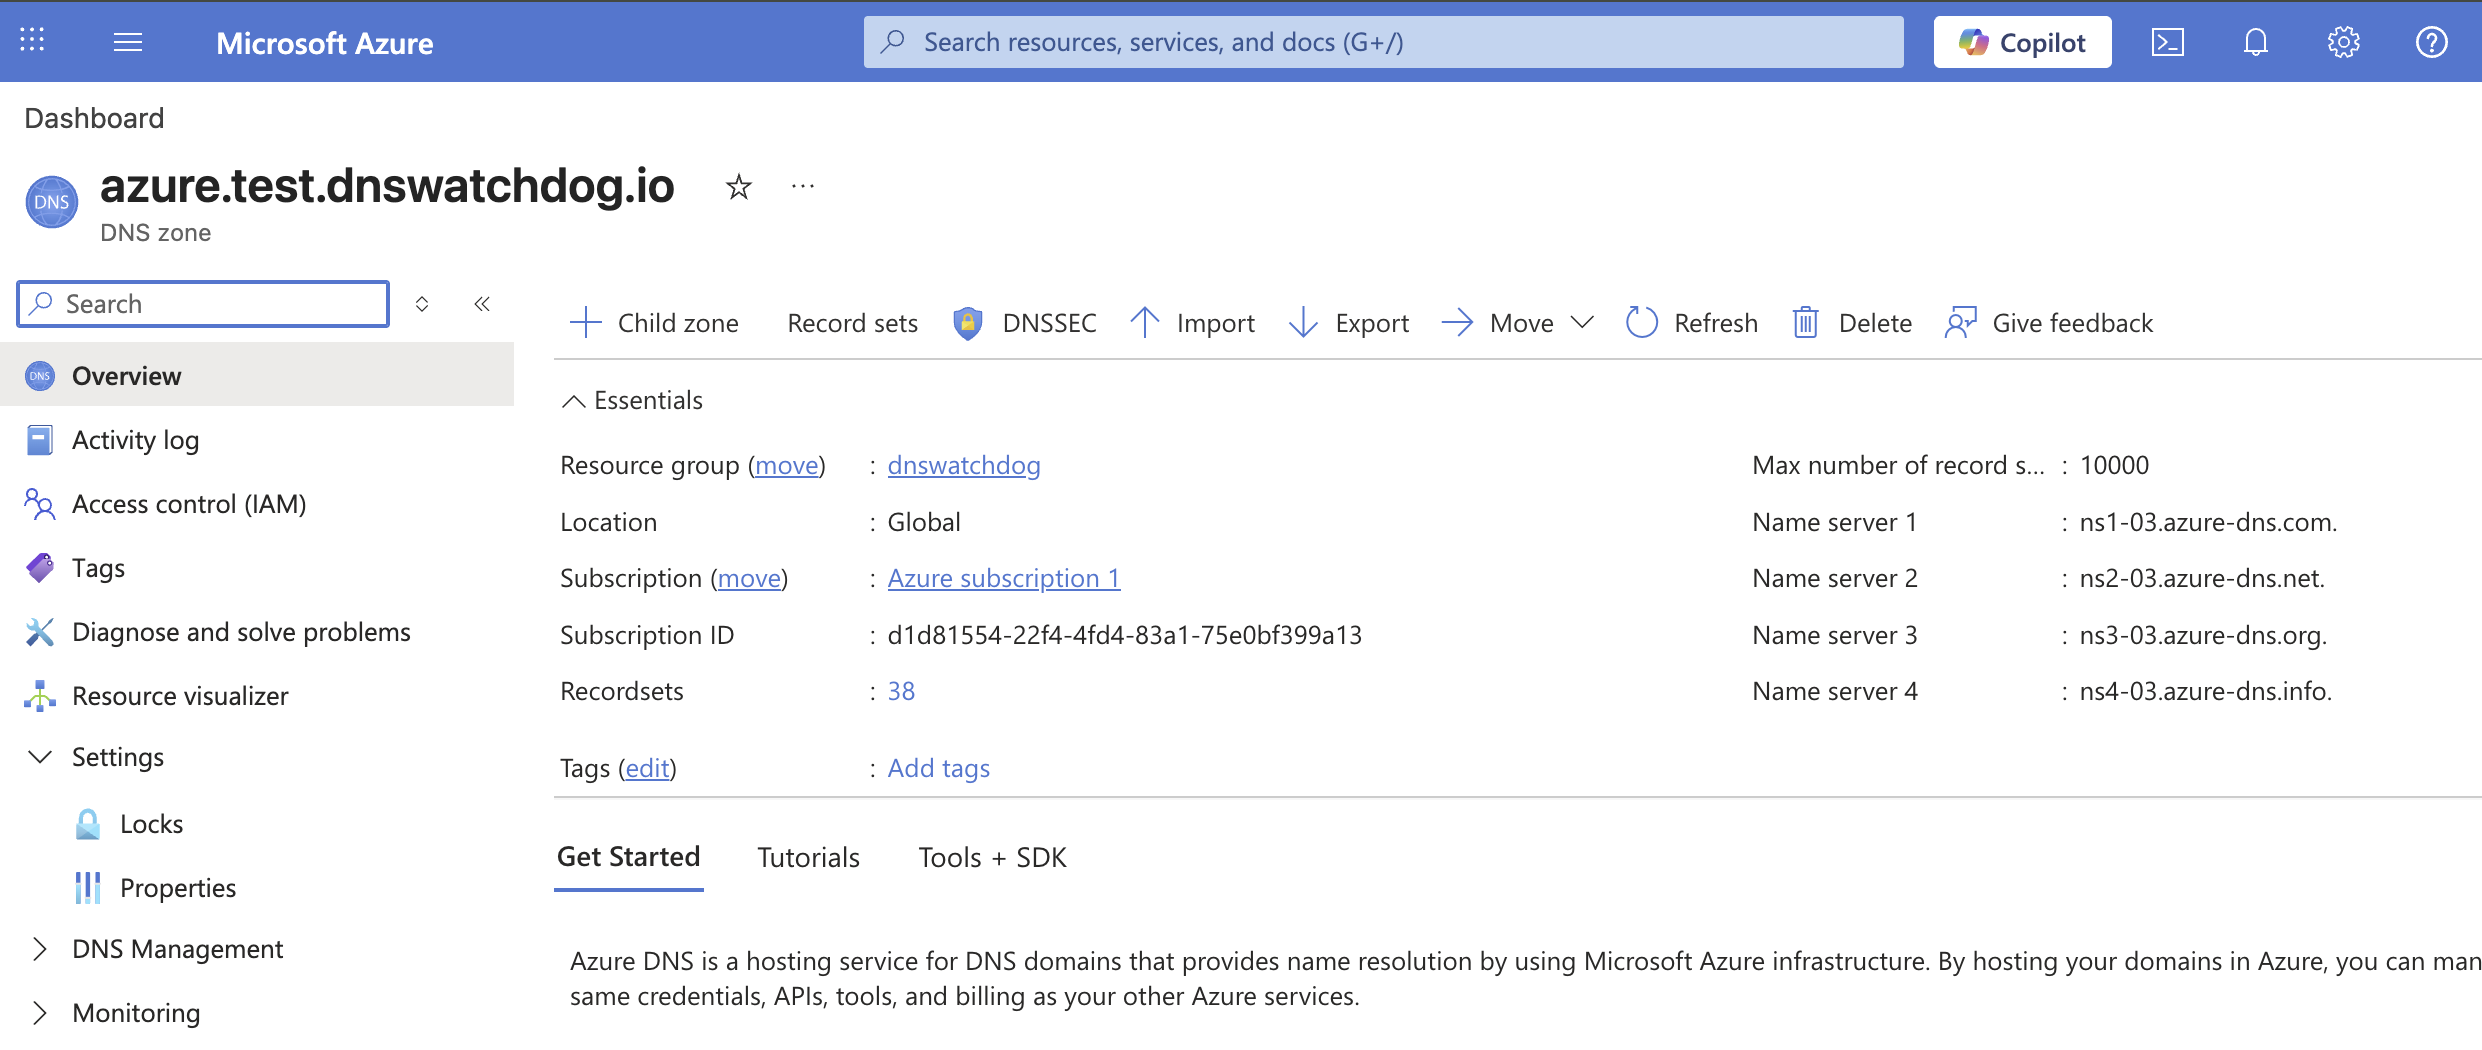
In the Azure Portal, search for Subscriptions or select it from the left-hand menu. Select your subscription — the Subscription ID is shown on the Overview page.
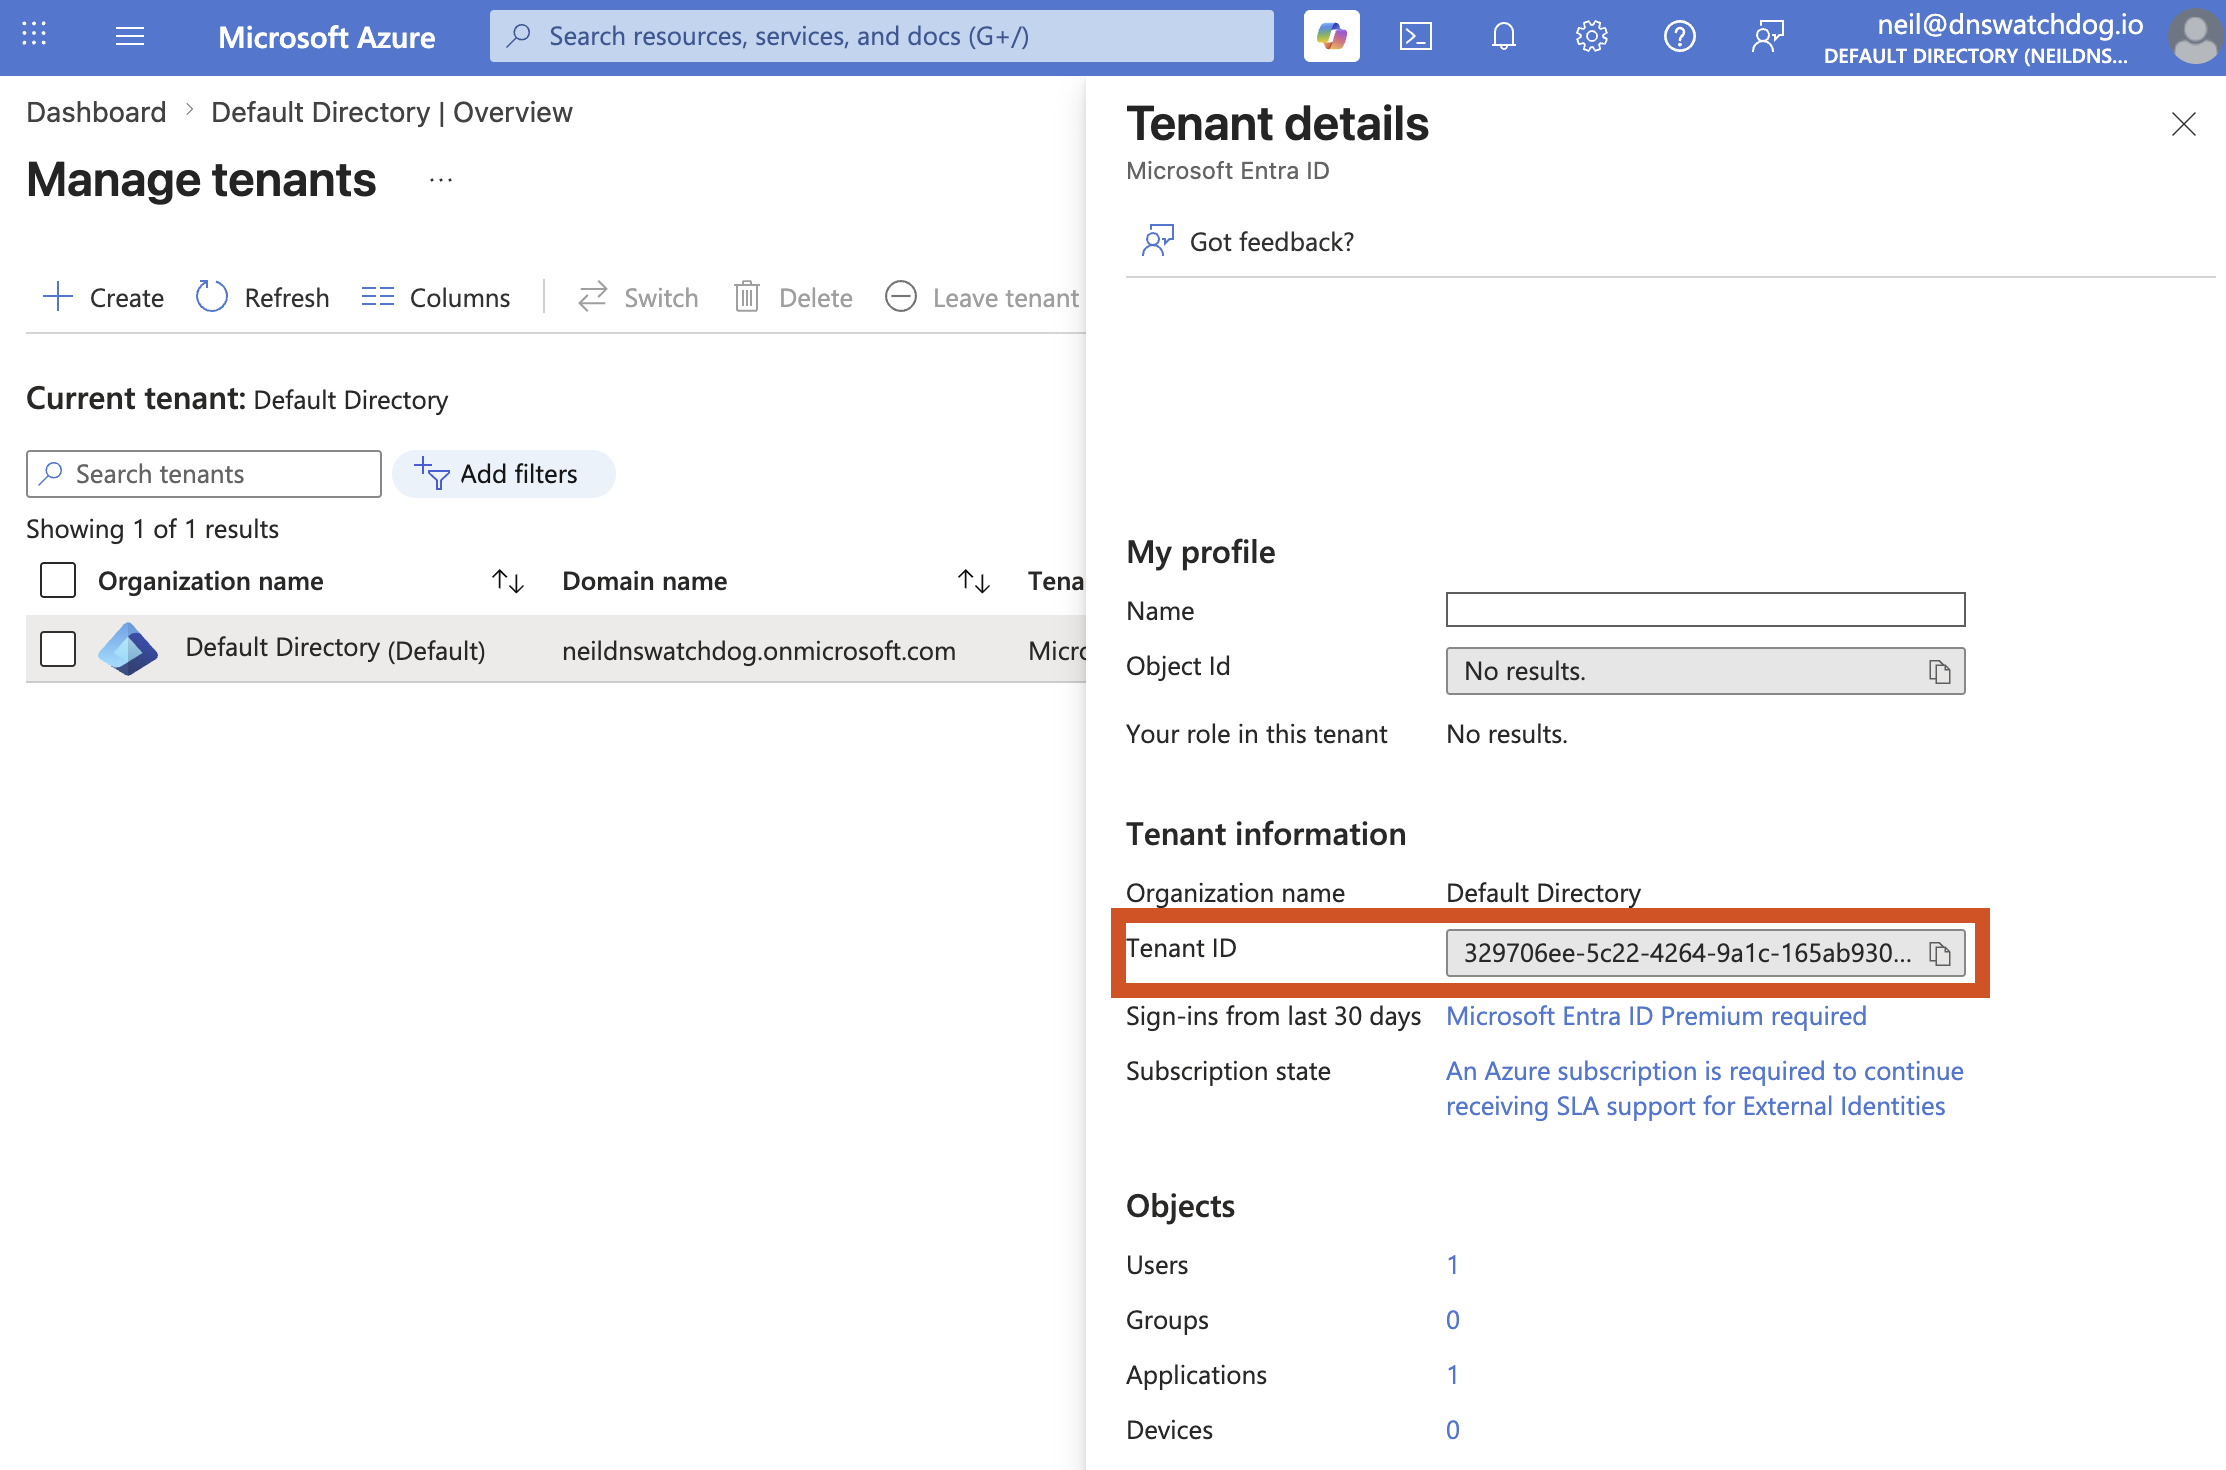
In the Azure Portal, search for Microsoft Entra ID (formerly Azure Active Directory). The Tenant ID is displayed on the Overview page under "Basic information".
The Client ID comes from an App Registration in Microsoft Entra ID.
In the Azure Portal, search for Microsoft Entra ID and select it
In the left-hand menu, click App registrations
Click New registration at the top
Enter a name (e.g. dns-watchdog)
Leave the default Supported account types selection (single tenant)
Leave Redirect URI blank
Click Register
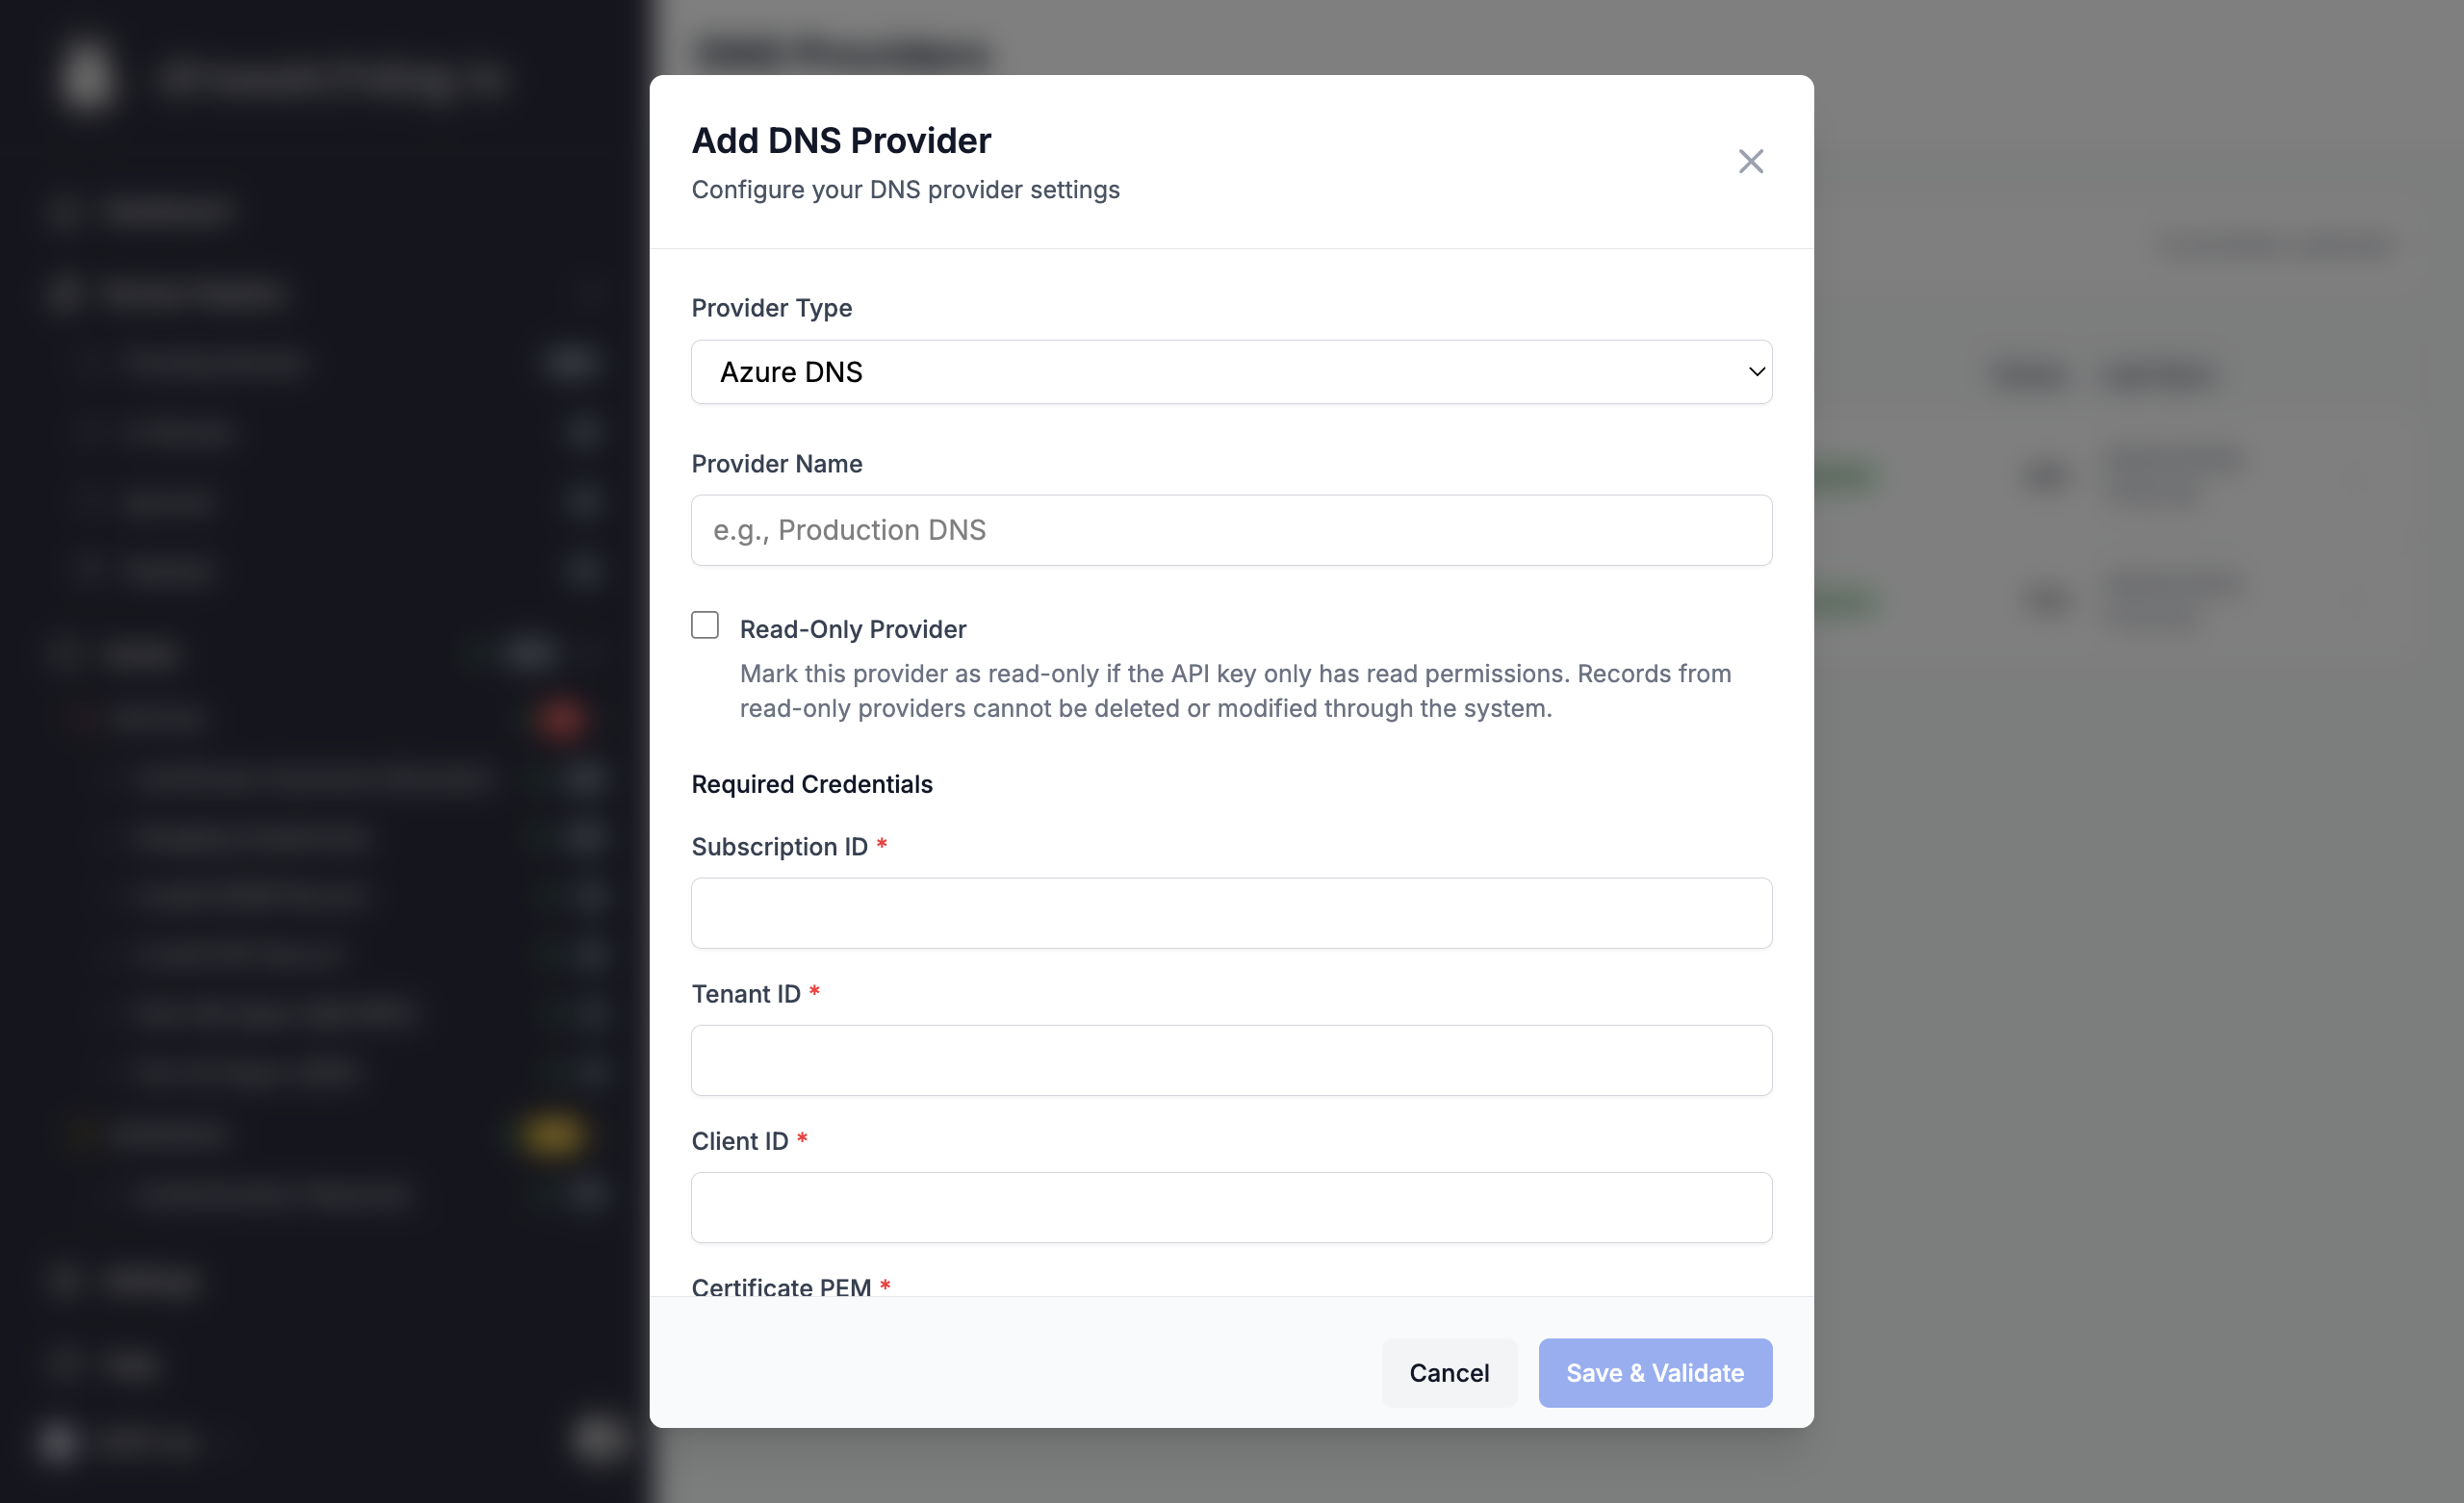
On the app's Overview page, note down the Application (client) ID — this is the Client ID you'll enter in DNS Watchdog
If you need to find the Client ID later, go to Microsoft Entra ID → App registrations → select your app → the Application (client) ID is on the Overview page.
# Create the app registrationaz ad app create --display-name "dns-watchdog"
The appId in the output is your Client ID.
To look it up later:
az ad app list --display-name "dns-watchdog" --query "[].appId" -o tsv
DNS Watchdog authenticates using a certificate. You'll generate a certificate locally, upload the public half to Azure, and provide the combined PEM (certificate + private key) to DNS Watchdog.
Open a terminal and generate a self-signed certificate:
This creates two files: cert.pem (public certificate) and key.pem (private key)
In the Azure Portal, go to your App Registration → Certificates & secrets
Select the Certificates tab and click Upload certificate
Upload the cert.pem file
Combine both files into a single PEM for DNS Watchdog:
cat cert.pem key.pem > combined.pem
The contents of combined.pem is what you'll paste into the Certificate PEM field in DNS Watchdog.
# Generate a self-signed certificateopenssl req -x509 -newkey rsa:2048 -keyout key.pem -out cert.pem \ -days 365 -nodes -subj "/CN=dns-watchdog"# Upload the certificate to the app registrationaz ad app credential reset \ --id <CLIENT_ID> \ --cert @cert.pem# Combine into a single PEM for DNS Watchdog (must include both certificate and private key)cat cert.pem key.pem > combined.pem
You can scope to an individual DNS zone by appending /providers/Microsoft.Network/dnsZones/<ZONE_NAME> to the scope.
You can scope the role to:
A subscription — access to all DNS zones in the subscription
A resource group — access to all DNS zones in that group
An individual DNS zone — access to a single zone only
The narrower the scope, the better. If DNS Watchdog only needs access to a single resource group, scope the role there rather than at the subscription level.